How to Install an Exterior Door in 2026?
Installing an exterior door in 2026 is not simply a matter of hanging a slab and tightening screws. It is a weather-control project. The opening must remain square, dry, insulated, and securely fastened. The U.S. Department of Energy’s Building America Solution Center identifies jambs, thresholds, and weatherstripping as important air-sealing locations. Small gaps can create drafts, moisture paths, and higher heating or cooling demand. The details matter.
DOE Energy Saver estimates that air sealing can reduce annual heating and cooling costs by 5% to 30%, depending on a home’s condition. That figure is not a promise for every doorway. It shows why a thin, careless bead of sealant deserves attention. The National Fenestration Rating Council also recommends comparing U-factor and solar heat gain performance through certified product labels. Ratings must match the specific door and climate. Measure twice. Cut once.
Zonda’s 2024 Cost vs. Value Report estimated a 188.1% cost recoup for steel entry-door replacement nationally. That is a market average, not a guaranteed return. A poorly installed door can still lose energy, bind against the frame, or admit rain. This guide covers rough-opening checks, sill-pan preparation, shimming, fastening, insulation, flashing, and final adjustment. A level can show alignment, but it cannot reveal every future leak. Some openings are imperfect. Good installation recognizes that reality, documents the problems, and corrects them before trim hides the evidence.
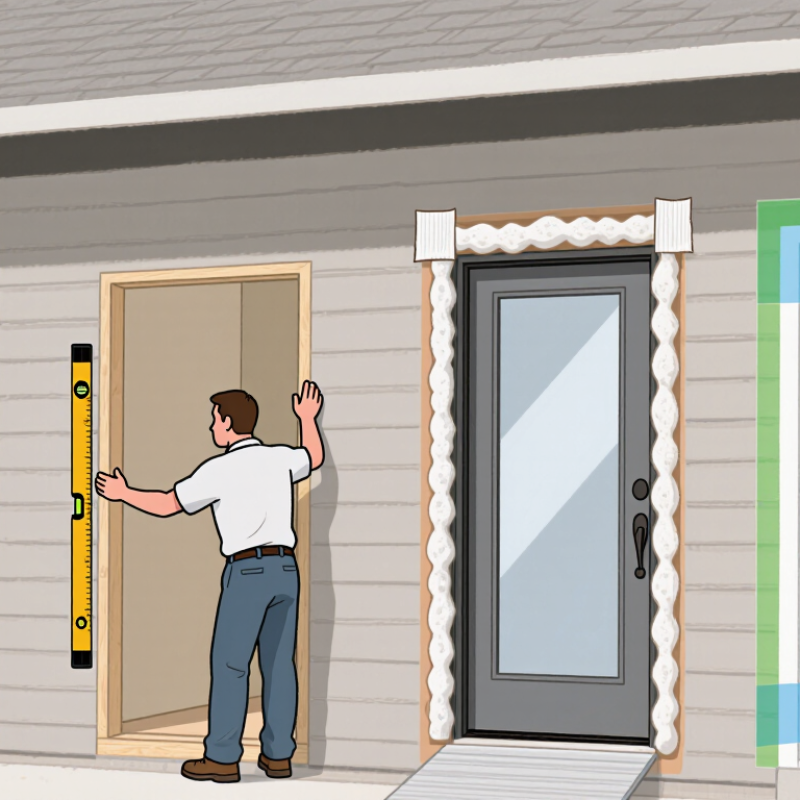
Measure the Opening: A 36 × 80-Inch Door Typically Needs a 38 × 82½-Inch Rough Opening
A 36 × 80-inch exterior door typically needs a 38 × 82½-inch rough opening. This extra space allows room for the jamb, shims, insulation, and minor framing movement. The 38-inch width is a guideline, not a promise. Always check the door unit’s installation instructions before cutting.
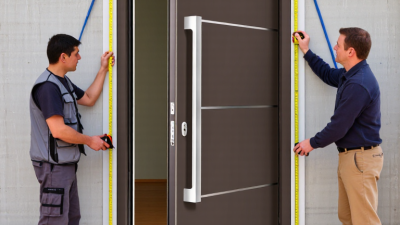
Measure the opening in three places across the width and three places vertically. Record the smallest width and height. For example, an opening measuring 38 inches at the top but 37¾ inches near the sill cannot safely accept a standard 36-inch unit without correction. Check the floor level, too. Uneven flooring can reduce the practical height by several millimeters. That small error can create a stubborn door swing.
The 2024 International Residential Code requires an egress door to provide at least 32 inches of clear width and 78 inches of clear height. A typical 36 × 80-inch door satisfies those minimums, but the rough opening still needs careful preparation. The U.S. Department of Energy’s Building America guidance also treats perimeter air sealing as part of a continuous building envelope. Use compatible backer material and sealant around the frame, while leaving drainage paths near the sill. I still recheck the opening before fastening. It feels repetitive. It prevents expensive surprises. One imperfect measurement can twist the jamb, expose gaps, or force awkward shimming.
How to Install an Exterior Door in 2026?
A standard 36 × 80-inch exterior door typically requires a 38 × 82½-inch rough opening. The additional space allows room for the door frame, shimming, leveling, and insulation.
Key measurement: The rough opening is 2 inches wider and 2½ inches taller than the nominal door size.
Remove the Old Unit and Inspect the Sill, Framing, and Sheathing
When installing an exterior door in 2026, removal is more than a demolition task. It is the first inspection. I begin by scoring paint and sealant around the old casing. This limits damage to the surrounding finish. I remove the trim carefully, then expose the fasteners holding the frame. A reciprocating saw can cut stubborn screws, but I keep the blade shallow. Hidden wiring or plumbing may be nearby. Slow work is safer. With help, I lift the old unit out instead of dragging it across the sill. I have learned that haste often turns a small repair into framing work.
With the opening clear, I inspect the sill for soft wood, staining, and trapped moisture. I press questionable areas with an awl. Firm wood resists; damaged wood gives way easily. The framing should be plumb, level, and square, though older homes rarely cooperate. I check both jambs and measure the diagonals. Unequal measurements reveal a twisted opening. The sheathing also deserves attention. Cracks, gaps, or damp insulation can weaken the weather barrier behind the door. I replace damaged sections and allow wet materials to dry before installation. Do not hide problems under new flashing. That shortcut can create expensive repairs later. Local building requirements may also call for specific sill support, drainage, and fastening details. I record every measurement, even when the opening looks acceptable. It is an imperfect habit, but memory becomes unreliable once the new frame arrives.
Set, Shim, and Fasten the Door; Check Plumb, Level, and Reveal
Set the prehung door into the opening with the sill fully supported and the hinge side facing the room’s plumb line. Keep the door closed while positioning it. Place shims behind each hinge and near the strike plate, then check the jamb with a level. Small movements matter. A heavy door can shift a careful setup.
Measure the reveal—the gap between door and frame—along both sides and across the top. Aim for an even gap, rather than trusting one quick visual check.
Fasten through the shims, starting at the hinge side, and recheck plumb after each screw. Use screws long enough to reach framing, but avoid overtightening; a bowed jamb can spoil the reveal.
The U.S. Department of Energy’s Building America guidance treats careful air sealing at openings as an important part of enclosure performance. ENERGY STAR estimates that air sealing and adding insulation can save homeowners an average of 15% on heating and cooling costs, though actual savings vary by house and climate.
Apply low-expansion door-and-window foam in a controlled bead, or use backer rod and sealant where appropriate. Too much foam can push the frame inward. I have seen a door look square before fastening, then rub at the latch afterward; recheck its swing and latch before fitting the trim.
Insulate and Seal the Perimeter, Keeping Weep and Drainage Paths Clear
A well-fitted exterior door still needs a continuous air seal around its frame. Use low-expansion window-and-door foam or backer rod with exterior-grade sealant, following the product instructions. Too much foam can bow the jamb and make the latch bind. Check the gap with a flashlight before covering it. Small gaps matter: the U.S. Department of Energy’s Energy Saver guidance estimates air leaks can account for 25–40% of the energy used for heating and cooling in homes. That figure covers the whole house, not one door, but it shows why careful sealing is worth the effort.
Keep water moving outward. Install flashing in shingle fashion, with upper layers overlapping lower ones, and preserve the sill pan’s drainage route. Do not fill weep openings or seal across channels designed to drain water. The Federal Emergency Management Agency’s Home Builder’s Guide to Coastal Construction emphasizes flashing and drainage as parts of a continuous water-management system. After sealing, inspect the sill and frame corners for blocked openings, then test the door with a controlled spray of water. Watch the threshold. If water pools instead of escaping, stop and correct the obstruction before interior trim hides it. A neat bead is not always a sound detail.
How to Install an Exterior Door in 2026? - Insulate and Seal the Perimeter, Keeping Weep and Drainage Paths Clear
| Installation stage |
Area or detail |
Recommended practice |
Verification |
| Before setting the frame |
Rough opening |
Confirm the opening is sound, clean, and sized according to the door manufacturer’s instructions. Check that the sill area is level and that the opening is plumb and square. |
Record width and height at multiple points; compare diagonal measurements and correct significant differences before installation. |
| Preparing for water management |
Sill and flashing |
Install sill flashing or a compatible sill pan with end dams where appropriate. Integrate it with the wall’s water-resistive layer so water can drain outward. |
Check that the sill protection is continuous, undamaged, and not arranged to direct water into the wall. |
| Setting the door |
Frame and threshold |
Set the frame according to its installation instructions. Use shims at specified fastening points and fasten into sound framing without bowing the jambs. |
Operate the door and confirm even margins, smooth latching, and a threshold that sits securely. |
| Insulating the perimeter |
Gap between frame and rough opening |
Fill the perimeter gap with backer rod or low-expansion foam specifically suitable for doors and windows. Follow product directions and avoid overfilling. |
Check for continuous insulation without foam pressure that could bow the jamb or interfere with door operation. |
| Sealing the exterior joint |
Trim-to-wall perimeter |
Apply a compatible exterior sealant where the installation detail calls for it. Use backer rod for joints that are too deep, and follow the sealant maker’s joint-width and curing guidance. |
Look for a continuous, properly bonded bead with no gaps; do not seal over drainage openings or designated weep paths. |
| Preserving drainage |
Weep holes and sill drainage channels |
Keep factory weep holes, sill channels, and other designed drainage paths open. Do not fill them with foam, caulk, paint, or debris. |
Inspect openings visually after sealing and remove any material that blocks the intended water exit. |
| Final inspection |
Weather seal and operation |
Check the weatherstripping, threshold contact, perimeter seals, and door operation. Use installation details appropriate to the wall assembly and local building requirements. |
Confirm the door closes and latches properly, seals evenly, and retains clear drainage routes. |
Follow the door manufacturer’s installation instructions and applicable local building codes. If the opening has rot, water damage, or structural movement, address it before installing the new door.




 Questions? Give Us A Call!